Showing posts with label Science. Show all posts

Monday, February 10, 2014

Co-op Science: Air is a Substance

After our last lesson on Solids, Liquids, and Gasses, we went a bit more in depth into Gas - specifically air.  It is such an abstract concept for young kids so it is important to explore it a bit more before moving on.  Again, these lessons are for kids K-2nd grade.

Air is a Substance Co-op Class
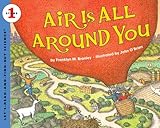
Book
Air is All Around You by Franklyn Branley

Air Takes Up Space
Stuff a paper towel in the bottom of a class and submerge in water.  Bring back up and the paper towel is dry!  Why?  Because the air in the glass is already taking up space and there is no room for water!  If you repeat the experiment and tilt the glass - the air is able to escape in the form of bubbles, and there is room for water to enter the glass.  Then of course the paper towel is wet!  They all enjoyed repeating this experiment themselves!

Insert balloon into "empty" water bottle.  Try to blow it up and it won't!  Why?  The water bottle is already full of air!  There is no room to add more air to the balloon inside the water bottle!  We then poked a hole in the bottom of the bottle; allowing air to escape.  Then of course there was room to inflate the balloon since as it filled up with air, the air already in the bottle could escape out the hole in the bottom.

Air Has Weight
1 deflated and 1 inflated balloon on my homemade scale proves that the air inside the balloon has weight.  The kids were shocked to see this as they had insisted that the air around them doesn't feel heavy like a solid or liquid does!
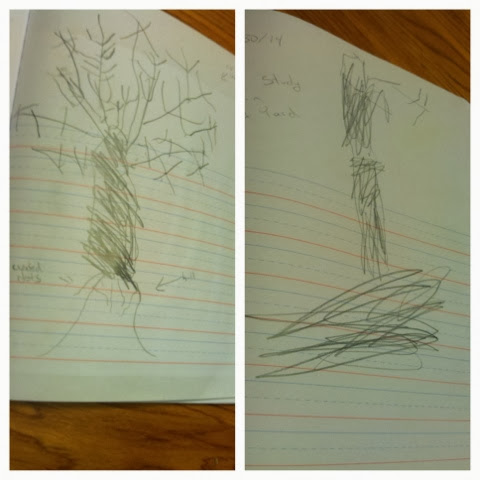
Journals
Of course, the kids journaled what they observed during the demonstrations.

Thanks for reading!

I'm Linking Up!

Thursday, February 6, 2014

January Nature Study


We finally pulled it together these past couple of weeks to fit in some nature study time.  It has been so cold and windy (and snowy!) that it was the last thing on my to-do list.  Although I've been following the Handbook of Nature Study blog for a while now, I just recently discovered their free printable nature study grids in their monthly subscriber newsletters.  I am awful at scheduling actual structured nature study times, so this is the perfect tool for a lazy busy Charlotte Mason mom!  We just glued the grid to the kids' notebooks and used the boxes to guide our outdoor time.

January Nature Study Grid


Winter Tree Silhouette Study
Directions: Look for a tree with no leaves.  Draw the shape of the tree in your nature journal.

Bark Rubbing
Directions: Smell the bark of a tree.  Make a rubbing for your nature journal.

Evergreen Comparison
Directions: Find two evergreen trees.  Observe how they are similar.
(Neither lose their leaves in winter.  One is wider and lighter green with poky branches and needles.  The other is taller and darker green with "bark-y" branches and smooth needles.)

Pine Cone Study
Directions: Can you find a cone?  Describe it with words.
(Pointy, bendy, light brown)

Pine Needle Study
Directions: Observe tree needles.  Measure the length, count the number of needles in a bundle.
(1. Length: 10 1/2cm, Texture: Poky, # of needles: 182
2. Length: 8 1/2cm, Texture: Smooth, # of needles: 85)

Cold Weather Study
Directions: Take a friend on a nature walk.  Can you go out on a cold day and see your breath?

Thanks for reading!

I'm Linking Up!

Saturday, February 1, 2014

Solid, Liquid, Gas Extension Activities

If you missed my first post on Solid, Liquid, Gas - go check it out!

Book
We checked out the book Change It! from the library. It was perfect for my kid's ages (4 & almost 6) and had a lot of neat ideas to explore the concepts of solid, liquid, and gas.

Solid: Make playdough and explore the idea that a solid can be stretchy and malleable and still be a solid.
Liquid: Pour 1 c of water into 3 different size containers w/ food coloring.  Talk about water being able to change shape to fit each container.  My kids were amazed that the amounts were the same!
Gas: Pour vinegar in a water bottle, and baking soda into a balloon.  Fit the balloon over the lid of the water bottle and drop the baking soda into the vinegar.  Watch the balloon expand as the gas created fills the balloon! 

Pinterest Finds
Check out the Pinterest Board I created with more fun ideas for Solid, Liquid, Gas learning!

Thanks for reading!

I'm Linking Up!

Tuesday, January 28, 2014

Co-op Science - Solids, Liquids, Gases

Last semester I was teaching science classes through one of my co-ops.  Part of the reason in picking our new science curriculum was because I felt like science is like math.  There should be a logical progression of learning rather than random lessons here and there on unrelated subjects.  I wanted to continue to offer the science classes, but in a way that complemented our new curriculum.

The way I set up science for this semester is that I teach a class roughly every 2 weeks on a new chapter in our book.  On the weeks in between we do extra lessons, activities, and experiments to expand on what we learned in the co-op class.  I also send home a Parent Packet full of ideas so that the students in my class can also work on things at home.  I look at this as the best of both worlds.  My kids get to experience a collaborative group setting to learn the basics of each chapter, and then get personalized one on one experience at home to go into each chapter in more depth.

I asked the families to work on the first chapter (Organizing Things into Categories) on their own at home and last week at our first meeting, we worked on the next chapter together.  This is what we did at our group class - I'll post on our individual lessons later!

Solids, Liquids, Gases Co-op Class

Group Activity: Solid, Liquid, Gas Object Identification and Sort
I had a large box (larger than pictured!) of items from around my house that the students, working as a team,  had to sort into 3 different plastic shoeboxes labeled Solid, Liquid, and Gas.


Science Notebook: Trifold notebook journaling solid, liquid, gas
The kids made a tri-fold notebook.  The inside of each flap had pictures, examples, and characteristics of each state of matter.

Breakout groups: Worksheet, Card Sort, Object ID
I had laminated sorting cards (found at TPT), and a worksheet for the kids to work on (also TPT).  They rotated between those and doing the sorting activity from above independently.

The class was about 1 hour and had about 10 students ranging from 5-8 plus a couple of preschool aged younger siblings.  All in all it was a success and I'm looking forward to my next class!

Thanks for reading!

I'm Linking Up!

Updated to Add:  See our extension activities here!

Monday, January 20, 2014

Science- Organizing Things Into Categories


We started our wonderful new Science Curriculum last week and really enjoy it so far. The first chapter was all about organizing things into categories (a major concept for later scientific processes). To close up the chapter I played a little memory game with the kids.

Classification Memory Game
I put out 20 objects on a tray and they had 60 seconds to try to memorize as many items as they could. Luckily my husband was home so he could help me write it all down afterwards!  Then, I asked them to try again, this time organizing things into categories in their heads to see if that would help them remember. Rafael had no change but Michaela did much better the 2nd time!

Sorting
Then I had them show me the categories they had divided things into. It was really interesting to see the differences in the way they did so. Michaela kept it simple - organizing things into Straight, Round, and Other. Rafael actually organized based on their uses - Church Things, School Things, Healthy Things (toothpaste, medicine syringe), Helpful Things (flashlight, cabinet handle), and Toys. 

I'm looking forward to continuing the lessons in this book!  Thanks for reading!

I'm Linking Up!

Wednesday, November 20, 2013

Co-op Science: Types of Rocks

A couple of months ago I hosted another science class for preschool-1st grade age students.  This time we were studying the 3 different types of rocks - Metamorphic, Igneous, and Sedimentary.

We started off by having a rock show and tell.  I asked the kids to bring some rocks to share and I borrowed some fancy rocks from a friend to show off as well.
Igneous
Igneous rocks are formed from cooling magma and so to demonstrate this, we lit some small tea candles and had the children pour the liquid wax onto wax paper and let it harden.  This of course should be done with adult supervision!

 Sedimentary
Sedimentary rocks are formed from various layers of loose sediment being compacted and cemented together over time.  We demonstrated this by having the kids create layers of colored sugar in baby jars and pushing down with a spoon to compact them.  I was planning to purchase a sand art kit, but couldn't justify the cost.  The food dye colored sugar worked just as well.

Metamorphic
Metamorphic rocks are formed when pressure and heat are applied to any other form of rock.  We demonstrated this by giving the kids different colors of playdough and having them form layers to create a sedimentary rock.  They then pressed them between their hands as hard as they could - which of course applied both pressure, and body heat.  The melded result was their metamorphic rock.

Snack!
We ate a related snack as well!  I made a Sedimentary cheese sandwich and then applied heat (stove) and pressure (spatula) to create Metamorphic grilled cheese.  Then I gave the kids a small amount of vanilla ice cream with some magic shell poured over it.  The resulting shell after it hardened was their Igneous dessert.

This was so much fun and I could see the lightbulbs going off in their heads.  Good times!  Thanks for reading!

Friday, October 4, 2013

Co-op Science: Senses

I teach preschool-1st grade science classes a couple of times a month through a local co-op group. My first class was all about our 5 senses!

We started off with a group activity where we ate popcorn and practiced using describing words to talk about what we were experiencing with our senses.


After the group activity, the kids took turns experimenting with the "stations" I had set up for each sense. 

Taste

I had 4 cups with various substances: unsweetened cocoa powder, lemon juice, sugar, and salt.
They had to taste each once and decide if they were bitter, salty, sweet, or sour.

Smell
I had six baby food jars w/ a cottonball dipped in various substances: cinnamon, lemon juice, vanilla extract, almond extract, peppermint extract, and orange extract.  They had to try to identify what was in each jar just by smelling.

Hearing
I had a dozen plastic eggs filled with 6 different items so that each item had a match.  They were beans, rice, a coin, nothing, lentils, and a bottle top.

Touch
Balloons filled with different things to match simply be feeling (sand, water, beans, rice, lentils).

Sight
A magnifying glass with interesting items to look at.  They each had a journal to write/draw about their observations.

It was a great class!  Thanks for reading!

I'm linking up!


Saturday, August 3, 2013

Nature Studies: Tadpoles and Caterpillars

Ever since we "discovered" the Charlotte Mason way of teaching, we have been immersing ourselves in nature and trying to be more aware to the world around us.  Thankfully God is helping us out a little bit by presenting us with amazing opportunities!

A few weeks ago, Philip discovered hundreds of tadpoles in the little seasonal pond that forms in the arroyo near our house during monsoon season.  He took the kids to see them and it was a unanimous decision to bring some home so that we could see their life cycle first hand!

Top Left: Hundreds of tadpoles in the pond, Top Right: Tadpoles Day 1
Bottom Left: Tadpoles Day 3 (Legs and shortening tail!), Bottom Left: Tadpoles Day 5 (Almost no tail!) 
We were out playing in the front yard earlier this week and saw a HUGE caterpillar inching along a patch of dirt.  I quickly ran inside to grab a large empty pasta jar, scooped some dirt and grass inside and picked up the caterpillar with a stick and placed it in the jar.  We did some research later in the day and discovered that this gorgeous caterpillar is actually going to turn into a dull brown moth.  The kids didn't care; they were thrilled that we might have a chance to see it pupate and change - even if it wasn't becoming a butterfly!


This particular caterpillar pupates underground so we made a habitat with tons of dirt and are hoping that it will pupate soon!  I did warn the kids that more often than not, caterpillars in captivity die so they are well prepared for that eventuality, but we are doing our best to encourage the natural life cycle of this little creature!

Thanks for reading!

I'm linking up!